 Owner
OwnerBanana Pi BPI-M2U has the Allwinner R40 chip. This chip does not include a hardware 1-wire interface. But we can implement this data exchange protocol at the software level using the bit bang method. The default Linux kernel (Raspbian Jiessie, 3.10.107) does not include the w1-gpio kernel module. I’ve tried to compile it, but it has many dependencies. I’ve found w1-gpio-cl. This is a Linux kernel-mode driver substitutes w1-gpio 1-wire bus master driver. Contrary to the standard driver, w1-gpio-cl doesn’t need many other kernel modules. Also you may configure this kernel module using command line parameters.
I’m using a cross-compiler in a virtual machine that allows to recompile the kernel much faster.
1. Clone and slightly modify the module.
1 2 3 4 5 | $ cd ~/ $ git clone https://github.com/pstolarz/w1-gpio-cl $ cd w1-gpio-cl $ make $ nano w1-gpio-cl.c |
change string:
1 | #include "w1/w1_int.h" |
to
1 | #include "w1-internal/w1_int.h" |
2. Copy the “w1-gpio-cl.c” file and “w1-internal” folder to /home/pi/BPI-M2U-bsp/linux-sunxi/drivers/w1/masters
3. Modify the “Makefile” file in “/home/pi/BPI-M2U-bsp/linux-sunxi/drivers/w1/masters” and add the source file.

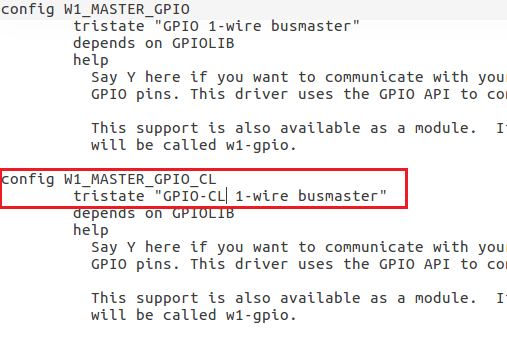
4. Modify the “Kconfig” file in “/home/pi/BPI-M2U-bsp/linux-sunxi/drivers/w1/masters” and add the compiler option for the new module. I’ve just copied the “W1_MASTER_GPIO” option above and changed the identifier.
5. Now, we should enable this module in the configuration.
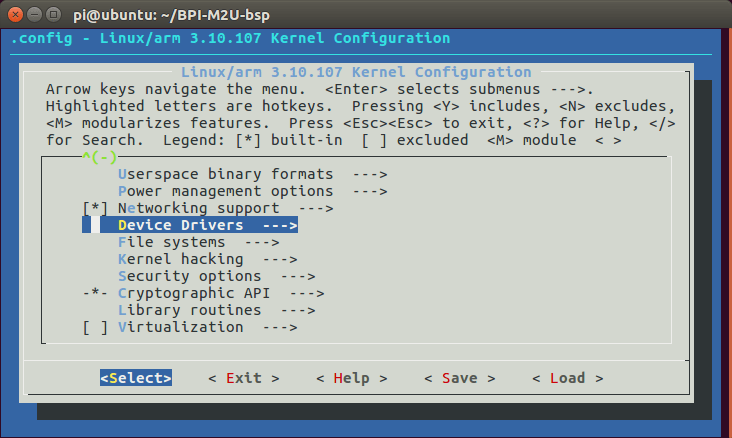
1 2 | $ cd ~/ $ sudo ./build.sh |
Select option #4 (configuration) and find the “Device Drivers” menu.
Press “Enter” and go to inside. There you can find “Dallas 1-Wire support” and need to place the “M” mark in the front (press “Space”).
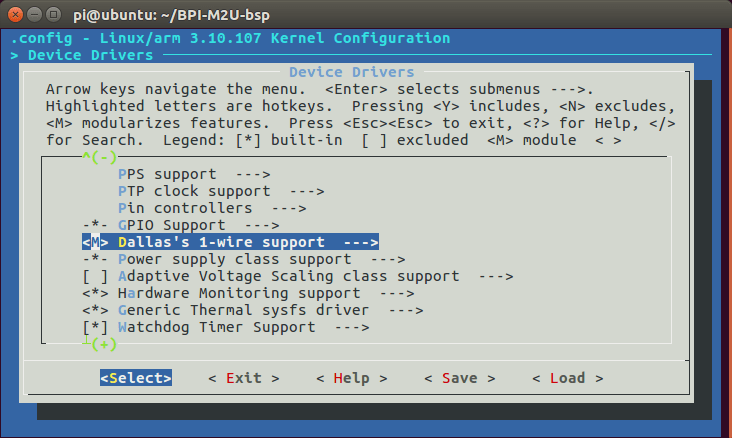
In the internal menu set the “M” mark for:
“1-Wire Bus Masters -> GPIO-CL 1-wire bus master”
“1-Wire Bus Slaves -> Thermal family implementation” (w1-therm kernel module).
6. Save the configuration with the “.config” name.
7. Exit from the configuration editor and re-compile the kernel (./build.sh, option #3).
8. Copy the following files to your BPi, to /home/pi/ (I’m using WinSCP).
/home/pi/BPI-M2U-bsp/linux-sunxi/drivers/w1/wire.ko
/home/pi/BPI-M2U-bsp/linux-sunxi/drivers/w1/masters/w1-gpio-cl.ko
/home/pi/BPI-M2U-bsp/linux-sunxi/drivers/w1/slaves/w1-therm.ko
9. Connect to your BPi and copy files from the home folder to the necessary location.
1 2 3 4 5 6 7 8 9 10 | $ cd ~/ $ sudo mkdir /lib/modules/3.10.107-BPI-M2U-Kernel/kernel/drivers/w1/masters/ $ sudo mkdir /lib/modules/3.10.107-BPI-M2U-Kernel/kernel/drivers/w1/slaves/ $ sudo cp wire.ko /lib/modules/3.10.107-BPI-M2U-Kernel/kernel/drivers/w1/ $ sudo cp w1-gpio-cl.ko /lib/modules/3.10.107-BPI-M2U-Kernel/kernel/drivers/w1/masters/ $ sudo cp w1-therm.ko /lib/modules/3.10.107-BPI-M2U-Kernel/kernel/drivers/w1/slaves/ $ depmod $ ldconfig $ sudo modprobe wire $ sudo modprobe w1_gpio_cl m1="gdt=249" |
Note about the pin number. You may use gpio utility from the “WiringPi2” repository and find this pin number.
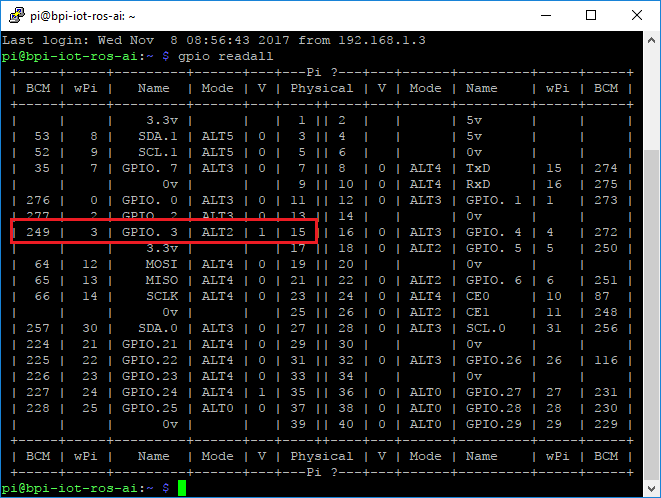
In my case I’ve selected the physical pin 15. This is the pin 249 on Banana Pi BPI-M2U.
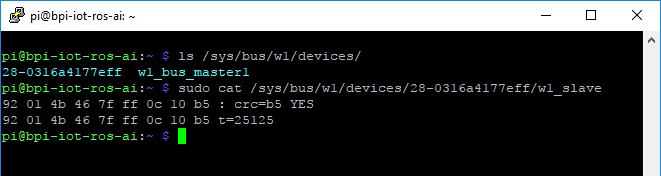
10. If you’ve installed the module successfully the W1 device should appear in your system.
1 2 | $ ls /sys/bus/w1/devices/ $ sudo cat /sys/bus/w1/devices/28-0316a4177eff/w1_slave |
Compiled modules you may download here.
 Owner
Owner